Picture a single-car garage painted over a long weekend in May. It’s two coats of dark green and seems like a “job well done”. A pat on the back and everything seems fine. But by the first heavy rain in July, a pale blister appears near the back wall. By September, you can lift a strip with your thumbnail.
Dust and an old oil stain come up stuck to the underside.
But if nobody cut corners, what went wrong? Could they’ve just painted a slab that wasn’t ready?
It’s a fact that concrete floor paint gets blamed for most of these failures. But it’s rarely the paint. Slabs soak up water, they sweat in humid months, and they hold grease in spots you wouldn’t guess.
The best tin on the shelf has nothing to hold on to if the surface is damp or filthy.
What follows in the rest of this piece is the order Colour Valley would work in and other aspects of the work.
Read the Slab Before You Buy Anything
The first question is: “How old is it?” Data sheets for most floor paints ask for about four weeks of curing on new concrete. This is sometimes more.
A slab can feel bone dry underfoot after one week. But the reality is that it isn’t; water and alkaline salts are still working their way out. A paint film sitting on top simply traps them.
You should check what’s already on the surface. Flick some water onto it and see if it sinks in and darkens the colour within a minute. This indicates porous concrete. If it also beads up, it means that something has coated the slab. It could be a sealer or old paint. It could also be thirty years of drips from a parked scooter.
You must remove the source of the problem before anything else happens.
| The moisture test almost everyone overlooks Cut a square of clear plastic about 30 cm across. Tape every edge down tight. Walk away for a day. Then come and lift it the next day. A fogged underside or concrete that’s gone dark means moisture is travelling up through the slab. That’s the plastic sheet check described in ASTM D4263. It is a practice written to flag capillary moisture before coatings go on. However, it says wet or not wet, but never how wet. Several water-based floor paint data sheets want surface moisture under roughly 10 per cent.Some ground-floor slabs fail this every monsoon because nothing damp-proof sits beneath them. Paint isn’t the fix there; waterproofing is. Sometimes the right call is to leave the floor bare. |
Choosing Concrete Floor Paint
At this point, ask “who walks here” and/or “what rolls over it”. For instance, a spare bedroom isn’t a garage that takes a hot car every evening.
Acrylic water-based paint works for:
- Balconies
- Storerooms
- Patios
- Quiet interiors
It dries quickly, smells mild and rolls on easily. Hot tyres will mark it. So will a steel almirah dragged across it.
Two-pack epoxy is the usual pick for workshops and garages. You stir a hardener into the base just before you start. You get a hard and glossy concrete floor coating that is unaffected by oil and plenty of household chemicals.
The price of that toughness is stricter prep, a slippery surface when wet, and fading or chalking if the sun hits it for years.
Does every floor need it? Not at all.
For instance, if used in a lightly used room, you’d pay for chemical resistance nobody will ever test. A workshop with oil drips is the opposite story because the cheaper option there often costs you a lot.
Alkyd floor paints are still around. They are quick-drying and cheap. They also scuff earlier than epoxy.
Sheen gets skipped in most buying decisions. Gloss looks sharp and wipes clean but shows every trowel mark and speck of dust. However, a satin finish hides a rough slab better.
Just pick a colour that is a shade lighter than you think you want. This is because a big floor would always look darker than you expect.
Don’t forget to ask for the technical data sheet instead of reading the shade card. Colour Valley Paints lists X1 Floor Coat among its speciality products. The sheet should tell you the traffic a floor paint for concrete is suitable for. It would also reveal the recoat window and the prep it expects.
Preparing the Surface
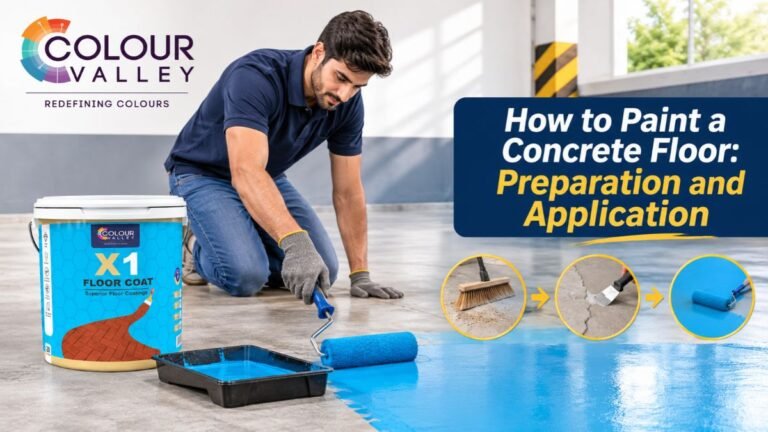
It’s important to prepare the floor surface like any other surface before painting.
This involves several things as mentioned below:
1. Cleaning and repairs
Vacuum before you sweep, not after. This is prudent, as a broom mostly pushes fine dust around.
Grease needs a real degreaser, scrubbed in with a stiff brush. This must be rinsed off thoroughly and given days to dry. Don’t hurry that part, as oil buried in the pores tends to creep back up as the slab dries out. Go over the stains again before moving on.
Moving to cracks, chip a hairline crack open a little so the filler has an edge to grab. Then pack it with polymer-modified repair mortar and give it the necessary cure time. A moving crack is the exception. If the slab is settling or flexing, it’ll usually show through the paint again.
2. Giving the paint something to grip
Power-floated concrete is hard and smooth. This is incompatible with paint.
The profile you want is a slightly rough surface like fine sandpaper under your palm. A hired grinder gets you there most dependably. Acid etching costs less but needs gloves, goggles and open windows. It also needs a lot of rinse water; leftover residue wrecks adhesion.
3. Kit worth gathering first
Collect the following as your kit:
- Stiff deck brush
- Degreaser
- A hired grinder or etching solution
- A 9-inch roller with a spare cover
- A 2-inch brush for edges
- Masking tape
- A respirator suited to dust or solvent
Epoxy adds a mixing paddle. This is a drill-powered paddle that helps evenly distribute pigments or other speciality additives throughout the mix.
Also buy a second roller cover. You don’t want to discover that the first one is shedding fluff when you are already halfway through a coat.
4. Primer or a thinned first coat
Some water-based floor paints prime themselves.
Thin the first coat by 10% to 20%, and it sinks into the pores. Epoxy generally wants its own primer that doubles as a sealer. Swapping brands at this stage is where jobs go wrong. You must use the primer the data sheet names and stick to its drying window.
Applying the Paint
Look at the weather first. Midday sun skins the surface before it can level. Similarly, a damp and drizzly afternoon slows curing and clouds the film. The “sweet spot” includes early mornings, dry days and cooler months.
Brush the edges and then roll from the far corner back toward the door. You paint yourself into a corner otherwise. Short-nap rollers suit smooth concrete, and a medium nap copes with rougher slabs.
It is important to keep the coats thin because thick ones sag, hold solvent and peel. Aim for two coats. Follow the recoat window on the tin, which runs anywhere from a few hours to most of a day. Note that ramps and wet areas call for an anti-slip additive. Glossy epoxy by a bathroom door has caused plenty of near falls.
After all that, it’s time to wait. Labels usually allow light foot traffic after about a day. Cars should stay off for several days. Epoxy can take up to a week to harden fully; the floor looks done long before it is.
Looking after it once it’s cured
Sweep often since grit under tyres and shoes acts like sandpaper. Use plain water or mild detergent for mopping. Keep harsh acidic cleaners away because they dull the gloss. Also, wipe oil spills fast. Fit felt pads under furniture and lift the toolbox rather than dragging it.
Wear patches by the door usually show within a couple of years. Patch them instead of a full repaint. It’s cheaper.
Before You Open the Tin
Good concrete floor paint holds up when three things line up: a cured slab, a dry slab, and a clean and roughened surface. Get those, and even a modest acrylic outlasts what people expect.
Still unsure which system suits your slab? Take a photo of the floor to your nearest dealer and ask for the data sheet before you pay. That’s cheaper than a second weekend of scraping. It also prevents a fresh floor from lifting in the first wet season.