A couple moves into a flat in April. The place has freshly painted walls, the shade chosen after much deliberation. But by the time the monsoon is phasing out in September, a crack has crawled out from one corner of the bedroom window. The line where the ceiling meets the wall has also opened like a seam.
The couple wonders what went wrong: the painter was punctual and the bill was settled. Nobody can remember anything out of place.
There’s more to it than these factors.
Paint cracking looks like a cosmetic complaint, and sometimes that’s all it is. This is where the film has simply failed; a proper repaint fixes it for good.
Often, though, the issue is more serious. The wall underneath is moving or damp, or still curing. In this case, a fresh coat on top will split again before the next winter.
Working this out is most of the job. Rushing through or a wrong step at this point will just result in pointless work and a waste of money.
Read through this article to learn all the caveats regarding paint cracking, the causes, and also the solutions.
What Happens Inside the Paint Film
Think of dried paint as a skin. It’s not a sticker. It’s thin, it’s hard, and it has to ride along with whatever it’s stuck to.
Also, walls don’t sit still. They swell a little in afternoon heat and shrink back at night. They take on moisture in July and dry out by March. Plaster and paint get pulled in slightly different directions all year, and a good film just absorbs it.
For years, usually.
Trouble starts when the film loses its elasticity and becomes brittle. Perhaps the coat was too heavy, or maybe nobody prepared the surface adequately. It could also be old paint or a wall that moves more than any film could follow.
Each of the above needs a different solution, which is why guessing can be very expensive.
Common Reasons Paint Cracks on Walls
As mentioned above, there are a number of possibilities to consider when figuring out why your paint cracked. This section notes and explains them.
1. The paint itself
This could be because a coat was applied too thick. The top dries first and forms a crust while the layer below is still wet. That lower layer shrinks, and the crust splits into fine lines.
Painters call it crazing. If you think adding water past what the tin allows for thinning will help, you’re wrong. You get a weak film that can’t stretch, regardless of how carefully it was rolled on. Conversely, recoating early means two layers drying at different speeds. They will tug at each other until one gives.
Coming to old walls, five or six layers of paint from different decades build a stiff stack that cracks like “reptile skin”. Another coat won’t hide it for long; that stack has to come off.
2. The surface underneath
Fresh plaster that hasn’t cured is the classic trap. Cement plaster needs roughly three to four weeks to dry out. This time frame goes up during a humid spell. It’s strongly alkaline at this time, which repels paint that wasn’t made to sit on it. Go too early, and you get cracks and blisters. You might also see white powdery salts rising through the colour.
Levelling a rough wall in a single thick pass of putty feels efficient. But a thick slab shrinks as it cures and splits; it drags the paint with it.
Two thin skims with sanding between them take longer on site. But they tend to stay put this way.
Look for these too:
- Dust nobody wiped off
- A greasy patch near the hob
- Flakes from the previous job
Paint can only hold as well as the layer it’s gripping.
3. The building itself
Brick and concrete don’t expand at the same rate. Hairlines show up where the two meet – under a beam or around a window frame. A newer building settles for a year or two, but heavy construction site next door can send vibrations through the structure. A leaking terrace works at and affects the wall from behind.
The cracks belong to the wall, but the paint gets blamed because it’s what you can see.
Reading the Crack Before You Fix It
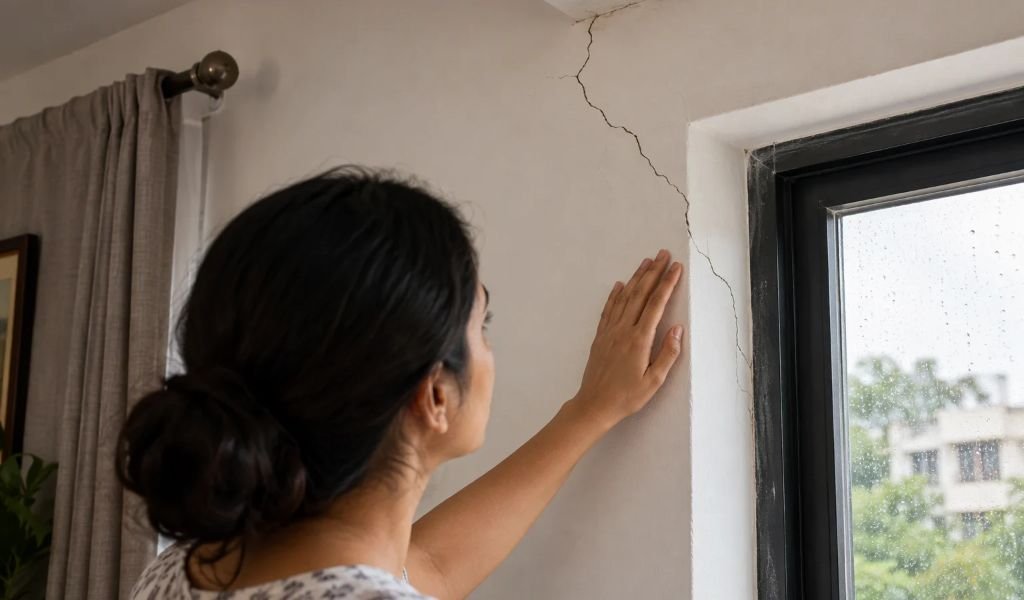
How do you tell paint trouble from wall trouble? Study the pattern.
- A mesh of short and random lines like dried mud is a paint problem. Maybe it was too thick a coat or recoated too soon
- Curling patches with several old layers visible at the edge indicate a tired paint stack. Moisture is one of the primary reasons behind paint peeling. Check for damp or bubbling before you blame the paint
- A straight hairline along a junction – wall to ceiling or brick to beam – is the building flexing
- A diagonal or stepped crack that’s still widening, or one you can slide a coin edge into, needs a structural engineer before it needs a painter
Pattern reading isn’t exact because a wall can show two problems at once.
You can mark the ends of the crack with a pencil and date it. If the crack has grown past your marks after a month, it’s growing.
Signs of moisture include tide-mark stains, a musty smell during the rains and powdery white salt on the surface. These indicate that there’s a leak you need to fix.
Wall Paint Repair That Holds
Start with the cause. Damp always comes first. Fix the leak, give the wall time (weeks in a humid spell). A repair over a wet wall is money wasted.
After that, it depends on what you found.
For hairline cracks in the paint alone, scrape off anything loose and sand the edges. Dust it off and skim a thin coat of putty. Let it dry, sand again, prime, and then apply two coats of finish.
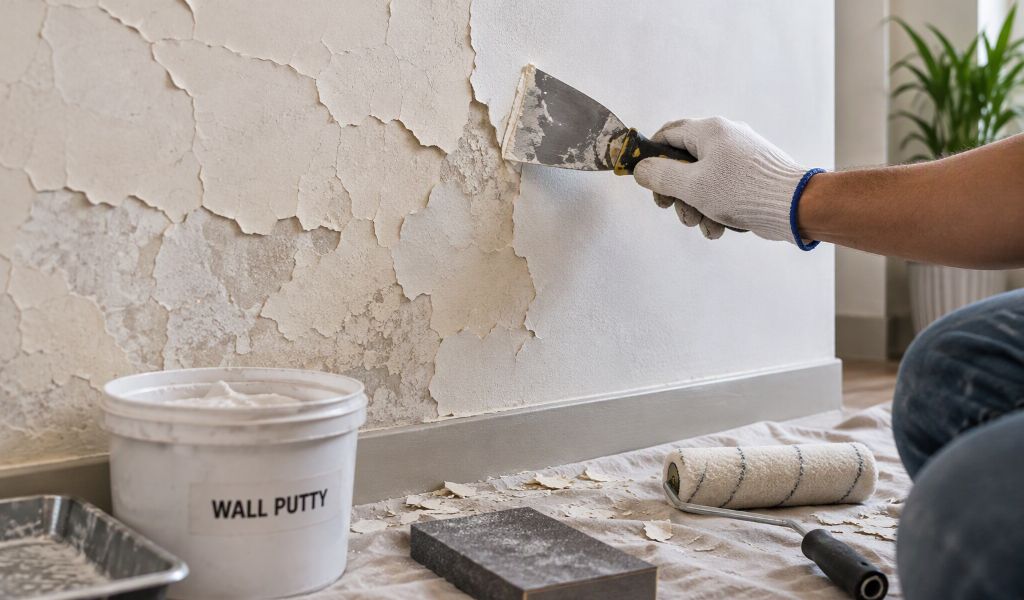
Drying times and recoat gaps vary by product. Trust the data sheet on the tin over anything else. Colour Valley follow the same logic, and our wall putty and primers range is where most of these repairs begin.
Cracks that keep moving need more than a skim.
Here’s what you do:
- Open the line up with a putty knife into a shallow V
- Clean it and fill it with a flexible crack filler
- Along a joint, bed fibre mesh tape into the filler
- Skim over it, sand, prime, paint
Flexible fillers cost more and cure slowly. Even a good job on a movement joint can show a faint line again after a few seasons. But that isn’t failed repair, just how your wall is supposed to be.
For old paint where big areas are lifting, strip it all by hand or with a scraper and sander. Painting over unstable layers only repeats the failure.
Stopping Paint Cracks (On Walls) Before They Start
Most of prevention is patience. But it’s not always easy to maintain your composure, especially when there’s a handover due.
A builder finishing a block of flats in a hurry will look at four weeks of plaster curing and see lost time. The family that moves in sees it another way. They expect quality.
| The best way to move this argument from personal opinions to compliance is to cite the Bureau of Indian Standards’ code of practice for painting concrete, masonry and plaster surfaces. |
Ask the painter which primer is going on and how long the plaster has been sitting. A vague answer to either one tells you something. Beyond that, remember these pointers:
- Alkali-resistant primer goes on new plaster and concrete
- Putty is applied in thin passes, sanded between
- Paint thinned only as far as the label allows
- The recoat gap must be respected
- Don’t paint a wall that’s still damp
- On a hot wall, paint can skin over before it has properly bonded
Coming off that last point, outside walls get the worst of it. Sun, rain and the swing from one to the other are harsh for painting.
A weather-rated finish from the exterior walls range suits most situations. A flexible elastomeric coating is worth the higher price on a wall that already has a history of hairline cracks. However, there’s a fair case for skipping it on a well-built and stable wall.
What to Check Before You Repaint
A crack isn’t automatically a verdict on the painter or the paint. It’s a clue. For instance, a web of fine lines, a stack of flaking old coats and a diagonally widening crack need three different responses.
Only one of those involves a brush.
Paint cracking costs the least when the prep is done right the first time or when you detect it early. Read the pattern and sort out moisture or movement before anything else. Fill thin, prime well and let new plaster take the time it needs.
If you’re weighing products for repair, the team at Colour Valley can help match a primer and finish to the relevant surface.